
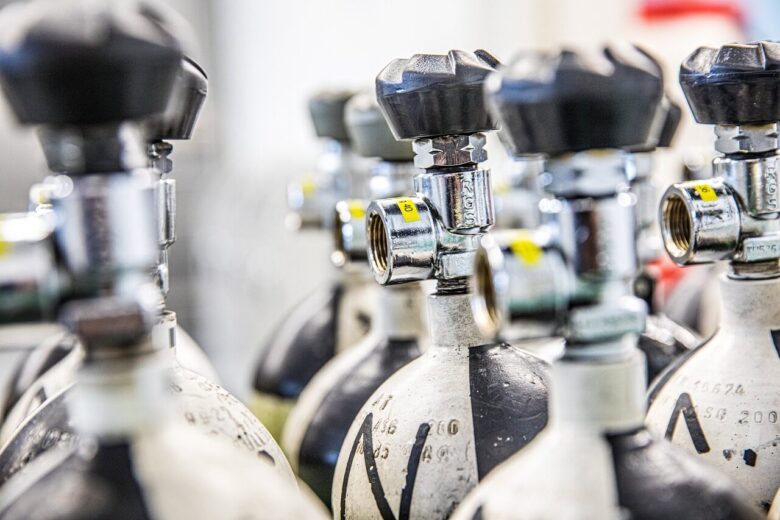
Ultrasound leak detection is one of the most practical ways to find hidden air leaks in compressed air systems without stopping production unnecessarily. Instead of relying only on hearing, soap bubbles, or visual inspection, this method uses high-frequency sound produced by escaping air to locate leaks more accurately in noisy industrial environments.
Compressed air is useful, but it is also expensive to generate. A small leak at a fitting, valve, hose connection, regulator, or pneumatic tool can waste energy, reduce system pressure, increase compressor run time, and create maintenance problems that are easy to ignore until they become costly.
This guide explains how to perform ultrasound leak detection step by step, from preparation and safety checks to scanning, tagging, documenting, repairing, and verifying leaks after maintenance. The goal is to help beginners understand the process clearly while also giving maintenance teams a practical structure they can use in real facilities.
In practice, many compressed air leaks are not found during normal walk-through inspections because the plant is already loud, the leak is above head height, or the sound is hidden near machines. Ultrasonic leak detectors help because they convert high-frequency leak noise into a signal the technician can hear, see, measure, and document.
Before starting, it is important to remember that leak detection is not only about finding air loss. It is also about working safely around pressurized equipment, rotating machines, elevated piping, electrical panels, production lines, and areas where access may be restricted.
Important safety note: ultrasound leak detection should be performed only after reviewing the site safety rules, personal protective equipment requirements, access restrictions, and lockout/tagout procedures. Never touch pressurized lines, electrical equipment, moving machinery, or elevated piping unless you are trained and authorized to do so.
What Ultrasound Leak Detection Means in Compressed Air Systems
Ultrasound leak detection works by identifying the high-frequency sound created when compressed air escapes through a small opening. This sound is usually above the normal hearing range of many people, especially in a noisy industrial area, but an ultrasonic detector can capture it and convert it into an audible signal through headphones.
The method is especially useful because compressed air leaks are often directional. When air escapes from a fitting, thread, valve, hose, quick coupling, or cylinder seal, the strongest ultrasonic signal is usually close to the leak point. By slowly scanning an area and looking for the strongest reading, the technician can narrow the source instead of guessing.
A typical ultrasonic leak detector may include a handheld receiver, headphones, a directional sensor, a display with decibel readings, sensitivity controls, and sometimes a camera or data logging feature. More advanced acoustic imaging tools can also show the approximate leak location on a screen, but the inspection logic remains similar: scan, confirm, document, repair, and verify.
One common mistake is assuming that every loud sound is a leak. Ultrasonic instruments can also detect other sources of high-frequency sound, such as electrical discharge, steam leaks, vacuum leaks, bearing issues, or some mechanical friction. For compressed air surveys, the technician must confirm that the signal matches the air system and not another nearby source.
| Leak source | Why it commonly leaks | What to check carefully |
|---|---|---|
| Threaded fittings | Loose installation, worn sealant, vibration, or poor alignment | Listen around the full circumference before marking the exact point |
| Quick couplers | Wear from repeated connection and disconnection | Check both the coupler body and the connected hose end |
| Regulators and filters | Damaged seals, drain valves, or cracked bowls | Scan drains, adjustment points, and housing joints |
| Pneumatic cylinders | Seal wear, rod damage, or internal bypass | Check rod seals, end caps, and ports during safe operating conditions |
| Hoses and tubing | Abrasion, bending, aging, or poor routing | Inspect bends, clamps, rubbing points, and tool connections |
Equipment and Preparation Before Starting the Survey
Before walking into the production area, prepare the inspection kit and define the scope of the survey. A well-prepared inspection is faster, safer, and easier to turn into real repairs. Without preparation, teams often find leaks but fail to document them clearly enough for maintenance planning.
The basic equipment usually includes an ultrasonic leak detector, headphones, spare batteries or charger, leak tags, marker, inspection form or mobile app, flashlight, camera, PPE, and site drawings if available. If the facility has piping at high elevation, a directional attachment may help scan from a safer distance, but it should not replace proper access procedures when close inspection is required.
It is also useful to decide how leaks will be classified before the survey begins. Some teams classify by sound level, estimated air loss, location criticality, repair difficulty, or production impact. The exact method depends on the equipment available, but the important point is consistency. If every technician uses a different system, the leak list becomes harder to prioritize.
- Confirm the inspection area, system boundaries, and production schedule before starting.
- Check that the ultrasonic detector, headphones, charger, and accessories are working.
- Prepare leak tags, a camera, notes, or a digital form for documentation.
- Review PPE requirements for noise, eye protection, footwear, gloves, and site-specific hazards.
- Confirm which areas require authorization, escort, lockout/tagout, or elevated access equipment.
- Decide how leaks will be numbered, classified, and reported after the survey.
In many facilities, the best time to perform a leak survey is when the compressed air system is pressurized but production noise is lower. This may be during a planned maintenance window, shift change, weekend inspection, or controlled downtime. However, some leaks only appear when equipment cycles, so the inspection plan should match how the system is actually used.
Step-by-Step Ultrasound Leak Detection Process
A good ultrasound leak detection process follows a clear route instead of random searching. The technician should move from the compressor room to main headers, branch lines, drops, air preparation units, hoses, production equipment, and end-use tools. This avoids missing areas and makes the final report easier to understand.
-
Review the compressed air system layout.
Start by identifying the compressor room, receiver tanks, dryers, filters, main headers, branch lines, and major production areas. This helps you create a logical route and prevents repeated scanning of the same section while missing another section completely.
-
Set the ultrasonic detector correctly.
Turn on the device, connect the headphones, select the appropriate sensor, and adjust sensitivity according to the environment. If the sensitivity is too high, background signals may confuse the inspection. If it is too low, smaller leaks may be missed.
-
Begin with a general scan from a safe distance.
Move the detector slowly across pipes, fittings, valves, drains, hoses, and equipment connections. Use a sweeping motion and listen for a clear increase in the ultrasonic signal. Avoid rushing because fast scanning can pass over small leaks.
-
Narrow the signal to the strongest point.
When the detector indicates a possible leak, reduce sensitivity or move closer only if it is safe. Scan around the suspected area from different angles until the signal peaks. The strongest point is usually near the actual leak source.
-
Confirm the leak before tagging it.
Check whether the signal is coming from compressed air and not from another source such as a bearing, electrical component, steam line, or nearby tool exhaust. When safe and appropriate, a secondary confirmation method such as soap solution may help pinpoint the exact leak.
-
Tag the leak clearly.
Attach a visible leak tag near the leak point without interfering with equipment operation. Include a unique leak number, date, area, and basic description. Never place tags where they can fall into moving equipment or create contamination risk.
-
Record useful repair information.
Document the location, equipment name, leak type, detector reading, photo, accessibility, likely component, and repair recommendation. A vague note such as “leak near machine” is usually not enough for a maintenance technician to fix it efficiently later.
-
Prioritize leaks for repair.
Group leaks by severity, safety risk, ease of repair, production impact, and required downtime. Some leaks can be fixed quickly, while others require parts, isolation, lockout/tagout, or planned shutdown.
-
Verify repairs after maintenance.
After repairs are completed and the system is safely repressurized, rescan the same points. Verification prevents false closure of work orders and helps confirm whether the repair solved the leak or if another nearby leak remains.
During the process, avoid touching fittings or tightening components while the system is pressurized unless the procedure is approved by qualified maintenance personnel. Finding a leak and fixing a leak are not always the same task. Detection can often be done while operating, but repair may require isolation and safe depressurization.
How to Document Leaks So Repairs Actually Happen
Finding leaks is useful only if the information leads to repairs. Many leak programs fail because the inspection produces a long list of points without enough detail, priority, photos, or ownership. A good report should make it easy for maintenance planners to understand what needs to be fixed, where it is located, and what preparation may be needed.
Each leak should receive a unique identification number. The same number should appear on the physical tag, the inspection form, the photo file, and the repair work order. This avoids confusion when several leaks are found in the same production cell or near similar equipment.
For each leak, include the location, equipment name, component type, description, detector reading if available, operating condition, estimated severity, access notes, and recommended action. If the leak is high above the floor, behind guarding, near electrical equipment, or in a restricted area, document the access issue clearly so the repair team can plan safely.
| Report field | Why it matters | Example of useful detail |
|---|---|---|
| Leak ID | Connects the tag, photo, and work order | Area B-014, Packaging Line 2 |
| Exact location | Reduces search time during repair | Top regulator outlet fitting, west side of machine |
| Component type | Helps identify tools and parts needed | Quick coupler, threaded elbow, drain valve, hose end |
| Detector reading | Supports prioritization when used consistently | Record the displayed level and sensitivity setting if the tool allows it |
| Photo | Helps repair teams recognize the point quickly | Wide photo for area context and close photo of the leak tag |
| Access notes | Prevents unsafe or incomplete repair attempts | Requires platform access and planned equipment stop |
A practical habit is to take two photos for every important leak: one wide photo showing the surrounding area and one close photo showing the exact tag or component. The wide photo helps the technician find the area, while the close photo confirms the repair point.
How to Prioritize Compressed Air Leaks After Detection
Not every leak should be repaired in the same order. Some are easy fixes that can be handled during routine maintenance, while others may require production downtime, replacement parts, or a qualified technician. Prioritization helps the team save time and avoid spending effort on minor leaks while larger or more accessible losses remain open.
Severity can be based on ultrasonic level, estimated air loss, pressure impact, operating hours, and production importance. A leak on a line that stays pressurized all day may deserve faster attention than a similar leak on equipment used only occasionally. The context matters as much as the sound level.
Accessibility is another important factor. A small leak that can be fixed safely in minutes may be grouped into a quick repair campaign, while a larger leak above a production line may need a planned shutdown. Good leak management balances energy savings, safety, production needs, and maintenance resources.
| Priority factor | Higher priority when | Lower priority when |
|---|---|---|
| Leak size | The signal is strong and the air loss appears significant | The signal is weak and limited to a minor connection |
| Operating time | The line stays pressurized continuously | The equipment is rarely used or isolated when idle |
| Access | The repair can be completed safely with normal tools | The repair requires special access, shutdown, or permits |
| Production impact | The leak affects pressure at critical equipment | The leak has little effect on process stability |
| Safety risk | The leak is near unsafe access points or damaged components | The leak is isolated and does not create immediate risk |
In many cases, the most effective first action is to repair obvious leaks that are safe, accessible, and inexpensive to fix. This creates early progress and builds confidence in the program. Larger or complex leaks can then be scheduled with proper planning instead of being ignored.
Common Mistakes During Ultrasound Leak Detection
Ultrasonic tools are powerful, but the quality of the result depends on how they are used. A common mistake is moving too quickly through the facility. Small leaks can be missed if the technician does not pause at fittings, drains, regulators, and hose connections where leaks often occur.
Another mistake is treating the detector reading as a complete repair decision. A decibel reading can help compare leaks when the same method is used, but it does not always provide a perfect measure of cost or air loss. Distance, angle, pressure, background noise, and tool settings can affect the reading.
Some teams also fail to rescan after repairs. This is a serious gap because a repaired component may still leak, a nearby leak may have been misidentified, or the repair may have introduced a new issue. Verification is what turns a leak list into a real improvement program.
- Do not scan too fast around fittings, valves, drains, and hose connections.
- Do not assume every ultrasonic signal is a compressed air leak.
- Do not repair pressurized components without approved procedures and authorization.
- Do not create vague reports that only say “leak found” without location details.
- Do not forget to record access restrictions, required parts, or shutdown needs.
- Do not close the leak record until the repair has been verified with a follow-up scan.
A good technician develops a consistent routine: scan slowly, isolate the strongest signal, confirm the source, document clearly, and verify after repair. This routine reduces false positives and makes the final report more valuable for maintenance planning.
Best Practices for Repair, Verification, and Follow-Up
After the survey, the leak list should be reviewed by maintenance, operations, and energy or reliability personnel if those roles exist at the facility. The goal is to convert findings into work orders, assign responsibility, order parts, and choose safe repair windows.
Repair should be performed according to site procedures and equipment requirements. Depending on the leak, the solution may involve replacing a damaged hose, tightening a fitting after safe isolation, replacing a coupler, repairing a drain valve, changing a regulator, or correcting poor piping support. Temporary fixes should not become permanent if the underlying component is damaged.
Verification should be done under similar system conditions whenever possible. If the original leak was found while the line was pressurized and operating, the repaired point should be rescanned after the system is safely returned to comparable pressure. If the leak only appeared during a machine cycle, verification should include that operating condition when safe.
| Stage | Main action | Good practice |
|---|---|---|
| Before repair | Review the leak report and safety requirements | Confirm parts, access, isolation, and downtime needs |
| During repair | Fix the correct component using approved procedures | Follow lockout/tagout and depressurization rules when required |
| After repair | Repressurize safely and rescan the point | Compare the result with the original finding and confirm closure |
| Program follow-up | Track open, repaired, and verified leaks | Use the data to plan future inspections and prevent repeat issues |
In practice, a recurring leak at the same type of connection may indicate a larger issue, such as poor hose routing, vibration, wrong fittings, low-quality couplers, or lack of preventive maintenance. The best programs do not only fix individual leaks; they also identify patterns that cause leaks to return.
When to Use Soap Testing, Pressure Monitoring, or Professional Support
Ultrasound leak detection is very useful, but it does not replace every other method. Soap solution can still help confirm the exact point of a suspected leak when it is safe, accessible, and allowed by site rules. It is slower than ultrasound, but it can be effective for final pinpointing at a fitting or joint.
Pressure monitoring can help evaluate whether the compressed air system is improving over time. For example, if leaks are repaired but pressure problems continue, the issue may involve undersized piping, compressor controls, inappropriate air use, poor storage, clogged filters, or process demand changes. Leak detection is important, but it is only one part of compressed air system management.
Professional support may be needed when the system is large, the facility lacks trained personnel, the inspection requires advanced measurement, or the leaks are located in hazardous or difficult areas. A qualified compressed air specialist can help with system audits, repair prioritization, leak quantification, control strategy, and long-term efficiency planning.
- Use soap testing only where it is safe, accessible, and allowed by site procedures.
- Use pressure monitoring to understand system behavior before and after repairs.
- Seek professional support when leaks are widespread, hard to access, or linked to pressure instability.
- Ask qualified personnel before inspecting near electrical equipment, elevated piping, or moving machinery.
- Review official equipment manuals before changing components, controls, or system settings.
If the system supports critical production, medical, laboratory, food, pharmaceutical, or clean manufacturing processes, do not rely on informal leak repair alone. In those cases, air quality, pressure stability, system reliability, and safety requirements may need a more controlled engineering review.
How Often Should a Compressed Air Leak Survey Be Done?
The right inspection frequency depends on system size, operating hours, leak history, maintenance resources, and how critical compressed air is to production. A small shop may need a simpler periodic inspection, while a large plant may benefit from a formal leak management program with scheduled surveys and tracked repair completion.
Many facilities start with a baseline survey to understand the current condition. After the first repair cycle, follow-up inspections can show whether leaks are returning quickly or whether the system is improving. If leaks return often, the issue may not be inspection frequency alone; it may be component quality, vibration, poor installation, or lack of repair verification.
A practical approach is to combine routine operator awareness with scheduled ultrasonic surveys. Operators can report obvious air noise or damaged hoses, while trained technicians perform more detailed inspections using ultrasonic equipment. This creates a stronger program than relying on one annual inspection only.
| Facility condition | Suggested approach | Reason |
|---|---|---|
| New leak program | Start with a baseline ultrasonic survey | Creates the first leak register and repair priority list |
| Many recurring leaks | Inspect more often and review root causes | Repeated leaks may indicate poor components or installation issues |
| Stable system | Use planned periodic surveys and operator reporting | Helps maintain progress without excessive inspection effort |
| Critical production area | Use documented inspections and verified repairs | Pressure loss can affect reliability, quality, or uptime |
The most important point is consistency. A leak survey should not be a one-time activity that creates a report and then disappears. It should be connected to maintenance planning, repair tracking, verification, and continuous improvement.
Conclusion
Ultrasound leak detection gives maintenance teams a practical way to locate compressed air leaks that are hard to hear, especially in noisy industrial environments. By scanning carefully, confirming the strongest signal, documenting each leak, and prioritizing repairs, a facility can reduce waste and improve system reliability without relying on guesswork.
The best results come from a complete process, not only from the detector itself. Preparation, safety review, clear tagging, useful photos, repair planning, and post-repair verification are what turn ultrasound leak detection into a reliable compressed air management practice.
If leaks are widespread, difficult to access, related to pressure instability, or located near hazardous equipment, involve qualified maintenance personnel or a compressed air specialist. A safe and structured approach protects people, equipment, and production while helping the system operate more efficiently.
FAQ
1. What is ultrasound leak detection in compressed air systems?
Ultrasound leak detection is a method used to find compressed air leaks by listening for high-frequency sound created when air escapes through a small opening. A handheld ultrasonic detector captures that sound and converts it into an audible signal through headphones or a visible reading on the display. This helps technicians locate leaks even when the facility is noisy. It is commonly used around fittings, hoses, valves, regulators, cylinders, drains, and air tools. The method is useful because it can often identify leaks without shutting down the whole system, although repairs may still require safe isolation.
2. Why are compressed air leaks a serious problem?
Compressed air leaks can waste energy, reduce available pressure, increase compressor run time, and create unnecessary wear on equipment. Even small leaks can become costly if the system stays pressurized for long periods. Leaks may also cause production issues when equipment does not receive stable pressure. In some facilities, operators compensate by increasing system pressure, but that can make energy use and leakage worse. A structured leak detection and repair program helps reduce waste and supports more reliable operation. The exact impact depends on system pressure, leak size, operating hours, and compressor efficiency.
3. Can ultrasound leak detection be done while equipment is running?
In many cases, yes. Ultrasonic leak detection can often be performed while the compressed air system is pressurized and equipment is operating. This is one reason the method is popular in industrial facilities. However, the technician must follow site safety rules and avoid unsafe contact with pressurized lines, moving machinery, electrical equipment, hot surfaces, or restricted areas. Some leaks only appear when a machine cycles, so observing equipment during operation may be useful. Repairs are different from detection and may require lockout/tagout, isolation, depressurization, or a planned shutdown.
4. Is an ultrasonic detector better than using soap bubbles?
An ultrasonic detector is usually faster for surveying large areas because it can scan from a distance and detect high-frequency leak noise in noisy environments. Soap solution can be useful for confirming the exact leak point when the area is safe and accessible, but it is slower and less practical for a full plant survey. The two methods can work together. Ultrasound helps identify and narrow the likely source, while soap testing can confirm a fitting, joint, or small connection when needed. Site rules should always be followed, especially around sensitive equipment, electrical areas, or contamination-controlled processes.
5. What parts of a compressed air system should be inspected first?
A practical inspection route starts with major system areas and then moves toward end-use equipment. Common points include compressor room connections, receiver outlets, dryers, filters, main headers, branch lines, drops, regulators, lubricators, drain valves, quick couplers, hoses, pneumatic cylinders, and air tools. Many leaks are found near connection points because vibration, wear, movement, and repeated tool changes can weaken seals. It is also smart to inspect areas where operators report low pressure or where compressors seem to run more than expected. A planned route prevents missed sections and duplicate work.
6. Does a higher ultrasonic reading always mean a bigger leak?
Not always. A higher reading can suggest a stronger signal, but it does not always equal a precise leak size. Readings may be affected by distance, angle, pressure, background ultrasonic noise, detector sensitivity, sensor type, and the shape of the leak opening. For this reason, detector readings should be used consistently and combined with practical judgment. If the same technician uses the same method across similar conditions, readings can help prioritize repairs. For accurate cost estimates, some tools or professional audits may use additional calculations, but assumptions should be documented clearly.
7. How should leaks be tagged during a survey?
Each leak should receive a unique tag number that matches the inspection record and photo documentation. The tag should be placed close enough to guide the repair technician but not where it can interfere with moving parts, create contamination risk, block visibility, or fall into equipment. A useful tag may include the leak ID, date, area, and brief description. The digital or paper record should include more detail, such as exact location, component type, detector reading, photo, access notes, and recommended repair action. Clear tagging prevents confusion when several leaks are found in one area.
8. What information should be included in a leak report?
A good leak report should include the leak ID, area, equipment name, exact location, component type, detector reading if available, photo, severity category, access requirements, likely repair action, and verification status. The report should be practical enough for a maintenance planner to create work orders and order parts. Vague notes such as “air leak near machine” are not enough in a busy plant. It is better to write something specific, such as “leak at outlet fitting on filter-regulator unit, east side of Packaging Line 2, requires safe isolation before repair.”
9. How soon should compressed air leaks be repaired?
Repair timing depends on severity, safety, accessibility, production impact, and available maintenance resources. Some leaks can be repaired quickly during routine maintenance if they are safe and easy to access. Others may require replacement parts, equipment isolation, lockout/tagout, or planned downtime. A good approach is to prioritize leaks that are large, continuous, easy to repair, or affecting critical equipment. However, even smaller leaks should not be ignored forever because they can add up across a facility. The repair plan should be realistic, documented, and followed by verification after the work is complete.
10. Why is post-repair verification important?
Post-repair verification confirms that the leak was actually fixed. Without verification, a work order may be closed even though the component still leaks, the wrong point was repaired, or another nearby leak remains open. Verification is usually done by rescanning the repaired area with the ultrasonic detector after the system is safely pressurized again. The result should be recorded in the leak report. This step improves trust in the program and helps maintenance teams measure progress. It also helps identify recurring problems, such as poor fittings, damaged hoses, vibration, or incorrect installation practices.
11. How often should ultrasound leak surveys be performed?
The best frequency depends on the size of the system, operating hours, leak history, maintenance capacity, and importance of compressed air to production. A facility starting a new program may begin with a baseline survey, repair campaign, and follow-up inspection. After that, periodic surveys can be scheduled based on how quickly leaks return. Facilities with continuous operation, many hose connections, or repeated pressure problems may need more frequent inspections. Stable systems may use less frequent surveys combined with operator reporting. The key is to connect inspection results to repair and verification, not only to collect leak lists.
12. When should a facility call a compressed air specialist?
A compressed air specialist may be needed when leaks are widespread, pressure problems continue after repairs, the system is large or complex, or the facility needs more accurate analysis of energy use and compressor performance. Professional support is also useful when leaks are difficult to access, located near hazardous equipment, or connected to critical production processes. A specialist can help with leak surveys, system audits, control strategy, storage, piping review, demand analysis, and repair prioritization. Internal maintenance teams can handle many basic leaks, but complex system behavior often requires a broader technical review.
Editorial note: This article is for educational purposes and does not replace site-specific safety procedures, equipment manuals, lockout/tagout requirements, or assessment by qualified maintenance personnel. Compressed air systems can involve stored energy, moving equipment, elevated piping, and other hazards, so inspection and repair work should always follow approved facility procedures.
Official References
- U.S. Department of Energy — Compressed Air Systems
- U.S. Department of Energy — Minimize Compressed Air Leaks
- Natural Resources Canada — Energy Efficiency Reference Guide: Compressed Air
- OSHA — Control of Hazardous Energy
- Compressed Air Challenge — Finding and Fixing Leaks

Elena Voss is a certified industrial maintenance technician and safety compliance specialist with over 12 years of hands-on experience across manufacturing, energy, and facility management sectors. She holds certifications in OSHA 30-Hour General Industry, NFPA 70E Arc Flash Safety, and ISO 45001 Lead Auditor. Elena has spent her career working directly on thermal imaging inspections, lockout/tagout implementation, and precision calibration programs for industrial equipment. She writes to translate complex technical standards into practical, field-tested guidance that maintenance teams can apply immediately.